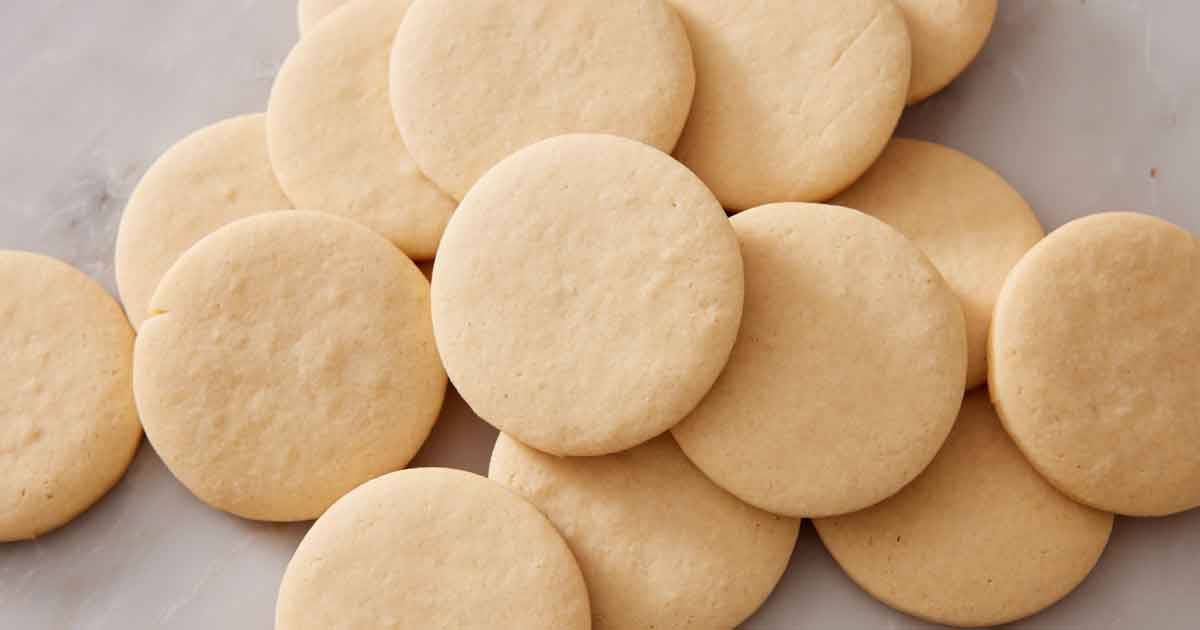
Unlock Perfect Cut-Out Sugar Cookies: The Secrets of Chilling and Butter
There’s a special kind of magic in creating beautiful, perfectly shaped cut-out sugar cookies. They’re a blank canvas for celebration, bringing joy to holidays, birthdays, or just a simple Tuesday afternoon treat. Yet, many home bakers face the common frustrations of cookies spreading in the oven, losing their intricate shapes, or becoming tough instead of tender. This comprehensive guide, built upon years of baking wisdom and countless successful batches, will unlock the secrets to a flawless cut out sugar cookie recipe, focusing on two often-overlooked champions: butter temperature and proper chilling. Prepare to master cookies that are beautifully crisp on the outside, delightfully soft within, and hold their shape every single time.
The Foundation: Ingredients and the Critical Role of Butter
A great cookie starts with great ingredients, and for our classic cut out sugar cookie recipe, simplicity is key. You'll need unsalted butter, white granulated sugar, an egg, vanilla extract (or other flavorings), all-purpose flour, salt, and optionally, a touch of baking powder for a slightly softer crumb.
The very first secret to success lies in the temperature of your ingredients. Just as a chef prepares their *mise en place*, a baker must ensure all ingredients, especially butter and egg, are at room temperature. This isn't just a suggestion; it's a fundamental step that ensures proper emulsification and a smooth, consistent dough.
The Butter Paradox: Not Too Soft, Not Too Hard
When it comes to butter, "room temperature" is a nuanced concept. For a no-spread cut out sugar cookie recipe, your unsalted butter should be firm enough to resist a gentle poke, but soft enough to leave a slight indentation. Think of it as pliable, not greasy or melted.
Why is butter temperature so critical? Butter is a solid fat at cooler temperatures, but as it warms, it begins to melt. If your butter is too soft when you cream it with sugar, it will incorporate too much air too quickly, leading to an over-aerated mixture. This excess air, combined with the butter's lower melting point, will cause your cookies to spread excessively in the oven, distorting those carefully cut shapes. On the flip side, butter that is too cold won't cream properly, resulting in a lumpy, uneven dough. Aim for that perfect middle ground, where the butter yields slightly to pressure without feeling oily. This ideal consistency ensures a stable emulsion that will hold its shape beautifully.
Once your butter is ready, cream it with the granulated sugar until light and fluffy. This process incorporates air, which contributes to the cookies' texture. Next, gradually add your whisked egg and vanilla mixture, ensuring it’s fully incorporated before moving on. For the flour, salt, and optional baking powder, a quick sift ensures an even distribution and prevents lumps. Gradually beat this dry mixture into your creamed butter mixture until the dough begins to come together in chunks. At this stage, avoid overmixing, as developing too much gluten can lead to tough cookies.
Mastering the Mix: From Chunks to a Perfect Disk
After combining your wet and dry ingredients, your dough will likely appear crumbly or chunky – this is perfectly normal and exactly what you want! The next step is where a gentle hand makes all the difference.
Carefully gather the dough from the bowl and transfer it to a clean surface. Now, gently knead it for just 10-20 seconds. The goal here is not to develop gluten, but merely to bring all the chunks together into a cohesive, pliable ball. Over-kneading will activate the gluten in the flour, making your cookies tough and chewy rather than tender. Once it forms a ball, flatten it slightly into a disk. This disk shape is not only ideal for initial chilling but also sets you up for effortless rolling later.
Precision Rolling: The Path to Even Thickness
Achieving evenly thick cookies is another vital component of a successful cut out sugar cookie recipe. Uneven thickness leads to inconsistent baking – some cookies might burn while others remain underdone. This is where rolling guides become your best friend.
Place your dough disk onto a piece of parchment paper or a silicone baking mat. Position two rolling guides (I recommend 1/4-inch or approximately 6mm thickness) on either side of the dough. Lay another sheet of parchment or a silicone mat over the dough. Now, roll your rolling pin across the top sheet, letting it rest on the guides. The guides ensure your rolling pin presses the dough down to a perfectly uniform thickness across the entire sheet. This simple technique guarantees every cookie bakes consistently and perfectly.
The Chilling Game-Changer: Why, How, and When to Chill
If butter temperature is the first secret, chilling is undoubtedly the second, and arguably the most crucial, for achieving no-spread cut out sugar cookies. Chilling the dough serves several vital purposes: it firms up the butter within the dough, preventing it from melting too quickly in the oven; it allows the flour to fully hydrate, improving texture; and it allows the gluten to relax, which further prevents tough cookies and spreading.
Chilling Strategy 1: The Rolled-Out Sheet Method
This method is a favorite for its efficiency. Once your dough is rolled out evenly between two sheets of parchment, simply slide the entire parchment sheet (with the dough) onto a cutting board or baking sheet. Cover it tightly with plastic wrap or a kitchen towel to prevent drying and refrigerate for 1 to 4 hours. You can extend this up to 24 hours, but be aware that after 24 hours, the very edges of the dough might start to dry out slightly. The advantage of this method is that when you're ready to bake, you simply remove the chilled sheet, peel off the top parchment, cut out your shapes, and transfer them directly to your baking sheet. This minimizes handling, which is crucial for preventing spread.
Chilling Strategy 2: The Dough Disk Method
If you prefer to make your dough ahead of time or need more flexibility, chilling the dough as a disk is an excellent option. Wrap your flattened dough disk tightly in plastic wrap (and an extra layer of foil for longer storage) and refrigerate for up to 3 days. While this offers greater storage time, be prepared for a very firm, almost rock-hard dough when you remove it from the fridge. It will need to sit at room temperature for 10-15 minutes to soften slightly before it can be rolled out. Once rolled, you'll still want to chill the rolled-out dough for at least 15-30 minutes before cutting and baking to ensure the butter is firm.
Regardless of the method, remember that chilled dough equals stable dough. This firm foundation is what allows your intricate designs to emerge from the oven looking exactly as they did before baking. For even more insights into achieving this stable, no-spread result, check out our guide on
Achieve Perfect No-Spread Cut Out Sugar Cookies.
The Final Chill: A Buffer Against Spreading
Even after chilling the main dough, sometimes the warmth of your hands or a warm kitchen can slightly soften your cutouts. If your delicate cookie shapes feel at all soft before they hit the oven, don’t hesitate to give them a quick "final chill." Place the cut-out cookies on your baking sheet and refrigerate them for another 10 minutes. This extra step is a small investment of time that pays off handsomely in crisp edges and perfectly preserved shapes.
Baking for Brilliance: From Oven to Icing Canvas
With your perfectly chilled, evenly rolled, and meticulously cut dough, you're just moments away from sweet success. Carefully lift your cut-out shapes and transfer them to a baking sheet lined with parchment paper or a silicone mat. Leave enough space between each cookie to allow for proper air circulation.
Preheat your oven to 350-375°F (180-190°C). The exact temperature can vary slightly depending on your oven and desired crispness, but this range is a great starting point for many a reliable cut out sugar cookie recipe. Bake your cookies for approximately 9-11 minutes. Keep a close eye on them, especially during the last few minutes. They are done when the edges are set and just beginning to turn a very light golden brown. The centers should still look pale and slightly soft. Overbaking will lead to dry, hard cookies.
Once baked, let the cookies cool on the baking sheet for a few minutes before transferring them to a wire rack to cool completely. This helps them firm up and prevents breakage. Now, your perfectly shaped, tender cookies are ready for your creative decorating touch, whether it’s a simple dusting of sugar, a swirl of royal icing, or an elaborate masterpiece.
Conclusion: The Art of the Perfect Cut-Out
Mastering the cut out sugar cookie recipe is truly an art, and like any art, it hinges on understanding the foundational techniques. By prioritizing the optimal temperature of your butter and embracing the power of proper chilling, you unlock the ability to create cookies that not only taste incredible but also boast beautifully defined shapes every single time. From the careful creaming of butter and sugar to the precision of rolling and the strategic use of your refrigerator, each step plays a crucial role in preventing dreaded spread and ensuring a tender, melt-in-your-mouth texture. Practice makes perfect, and with these secrets in your baking arsenal, you're well on your way to becoming a cut-out cookie connoisseur. For more in-depth advice and troubleshooting for your baking journey, be sure to explore our collection of
Easy Classic Cut Out Sugar Cookies: Pro Baking Tips. Happy baking, and enjoy the delicious rewards of your newfound cookie mastery!